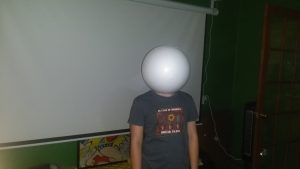
Here’s a brief run down on a DIY DeadMau5 head or helmet that I built with my son for Halloween.
Materials
- 2x 12″ Styrofoam half sphere ~$12 with coupon
- Harbor Freight Anti-Fatigue Foam Mat 4pk ~$6 on sale
- Black Acrylic Paint
- 2x Touch Lights at dollar store $2
- 2x Large white LEDs $3
- Switch $1.50
- Electrical Tape
- Heat Shrink
- Joann Fabric Mesh Cloth ~$3
- 2x Harbor Freight Rare Earth Magnets $2.99
Estimated Cost $33.48
Tools
- Hot Knife
- Razor Blade
- Hot Glue Gun
- Paper Template of shape one for the DeadMau5 Ear and on for the DeadMau5 Mouth
Cut the half circles to give room for the neck. Magnets hold the spheres together. Put the half spheres together and mark evenly spaced marks around on both spheres to recess 2 sets of magnets total into each side. Don’t do like me and try and use E6000 cause it melts styrofoam, use hot glue just don’t let it get real hot.
Next for the mouth and ears. Use the paper DeadMau5 Mouth template, cut slits into the paper to get the templates to lay evenly and flat onto the surface of the sphere and tape it. Mark lines lightly with a pencil then cut using the hot knife in a well ventilated area. Be careful because the foam melts easy. Use the paper DeadMau5 Ear template to mark and cut the foam for the ears. Note that you will have to cut a curve into the base of the ears to get it to lay flush.
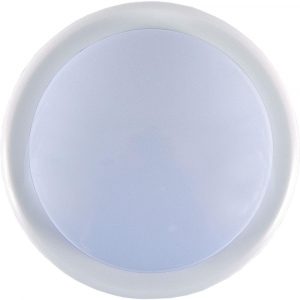
Now for the eyes. Take the 2 Dollar Store Touch Lights apart. You are wanting the dome that acts as a light diffuser. If you get lucky you might be able to use the leds. There will be lip around the outside edge of the dome that will need to be cut off and we used a hot knife for this.
Trace where the ears will be mounted on the sphere then cut/push a recess. Use black hot glue to fix the ears to the sphere. Paint the sphere and ears using acrylic paint. We applied 2 coats to get a good black color applied. Now take the domes you cut out and trace where you want the eyes. Cut/push in the outlines to better recess the domes. In the center of these eye traces you will want to make holes just smaller than the LED you acquired. Hot glue with black glue sticks the eyes. Make Xs on the eyes using electrical tape. Trace the mouth onto the fabric using the DeadMau5 Mouth template tracing slightly larger than the original. Using the black hot glue attach the fabric inside the mouth.
Now it’s time to wire up the LEDs for the eyes. This is pretty simple so I’m not going to post additional info unless asked. Amazon failed to deliver the Red El Wire on time for Halloween but we plan to add that soon. The Red El Wire will outline the ears and mouth.



You must be logged in to post a comment.